How to Add a Native Help Center to Your React Native App | Mobile SDK
• 7min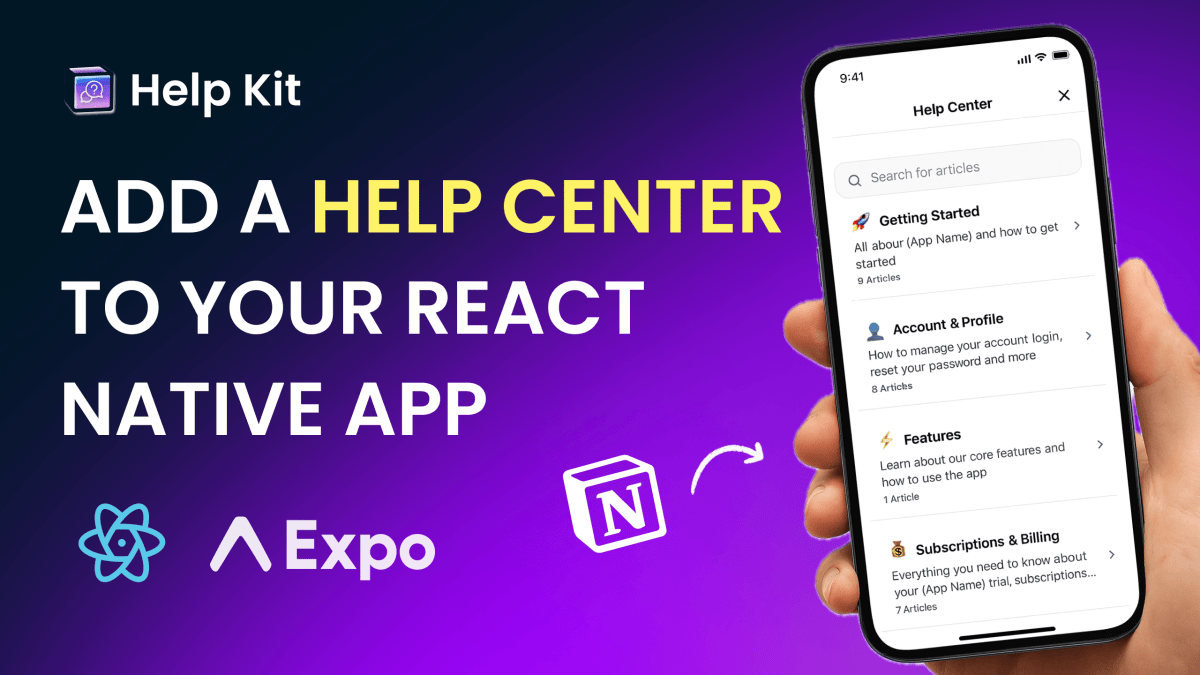
So you're building an amazing consumer app. Users are downloading, engaging, and loving what you've created. But then the support tickets start rolling in:
- "How do I cancel my subscription?"
- "Where do I find my account settings?"
- "Why isn't feature X working?"
Sound familiar? You're not alone. Every successful mobile app eventually faces the same challenge: as your user base grows, so does the volume of repetitive support questions that pull your team away from building and improving your app.
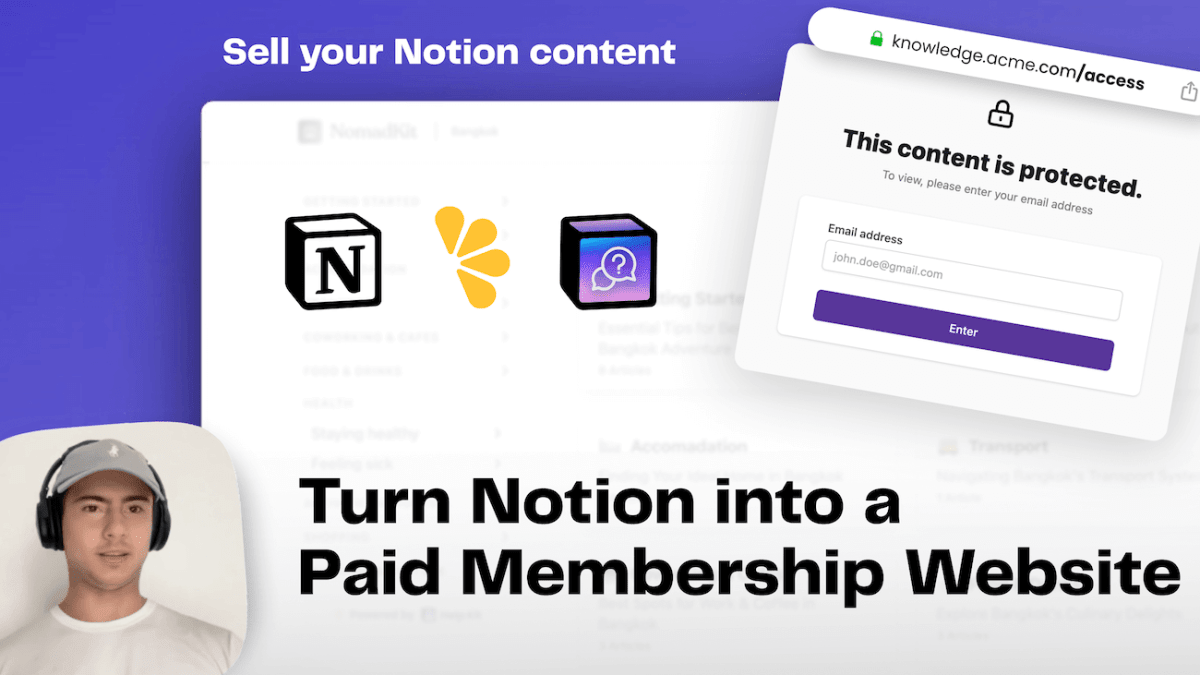
Well, what if we might have the perfect solution for you? You can use Notion in combination with HelpKit to create a beautiful help desk that’s easily embedded inside your React Native iOS/Android app. Your users get instant answers to their questions and you get to spend more time on working on the things that really drive your app forward.
More of a visual person? Watch the tutorial on how to add a HelpKit help center to your React Native app here ↓
The Cost of Reactive Support
When users can't find answers to their questions, several things happen:
- Support tickets pile up, requiring manual responses from your team
- App store reviews suffer when users get frustrated
- User retention drops when people can't figure out how to use your mobile app
- Development velocity slows as your team spends time on support instead of features
The solution? Deflect support tickets before they happen by giving users instant access to answers. A FAQ knowledge base with questions and answers is the perfect solution for this.
Why a Native Help Center Beats External Links
Most consumer app developers take one of these approaches when users need help:
❌ Link to an external help site – Users leave your app and may not return
❌ Direct users to a Notion page – Feels unprofessional and breaks the user experience
❌ Build a custom help system – Takes weeks of development time you don't have
✅ Embed a native help center – Users get help without leaving your mobile app, and you maintain complete control over the experience.
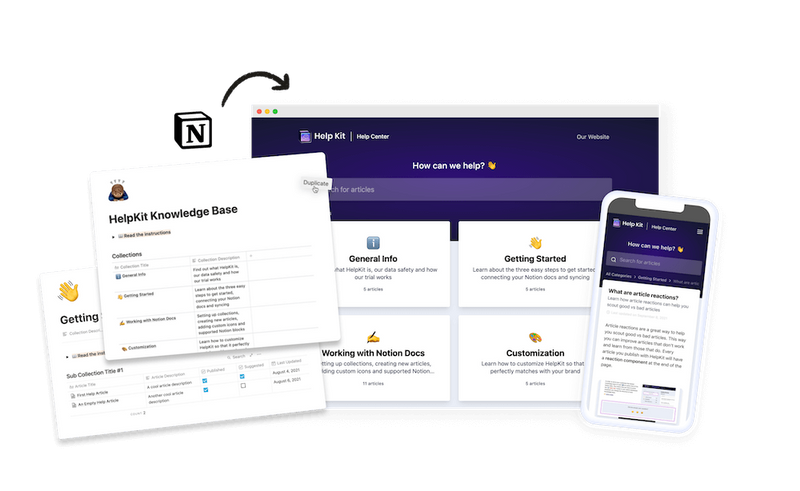
Introducing HelpKit's Mobile SDK: The Smart Solution
HelpKit bridges the gap between ease-of-use and professional experience. Here's how it works:
- Write your help articles in Notion (the tool you probably already use)
- Sync with HelpKit to transform your content into a beautiful help center
- Embed natively in your React Native app with just a few lines of code
- Get insights on user behavior to improve your content before the next support ticket arrives
The best part?
We've already done the heavy lifting for you. Our Mobile App Q&A Template includes the most common questions your consumer app might receive. We spent days perfecting these articles so you don't have to start from zero; just copy our template, customize it for your app, and you're ready to go.
The result?
A professional, searchable help center that feels like a natural part of your consumer app, while giving you the simplicity of managing content in Notion.
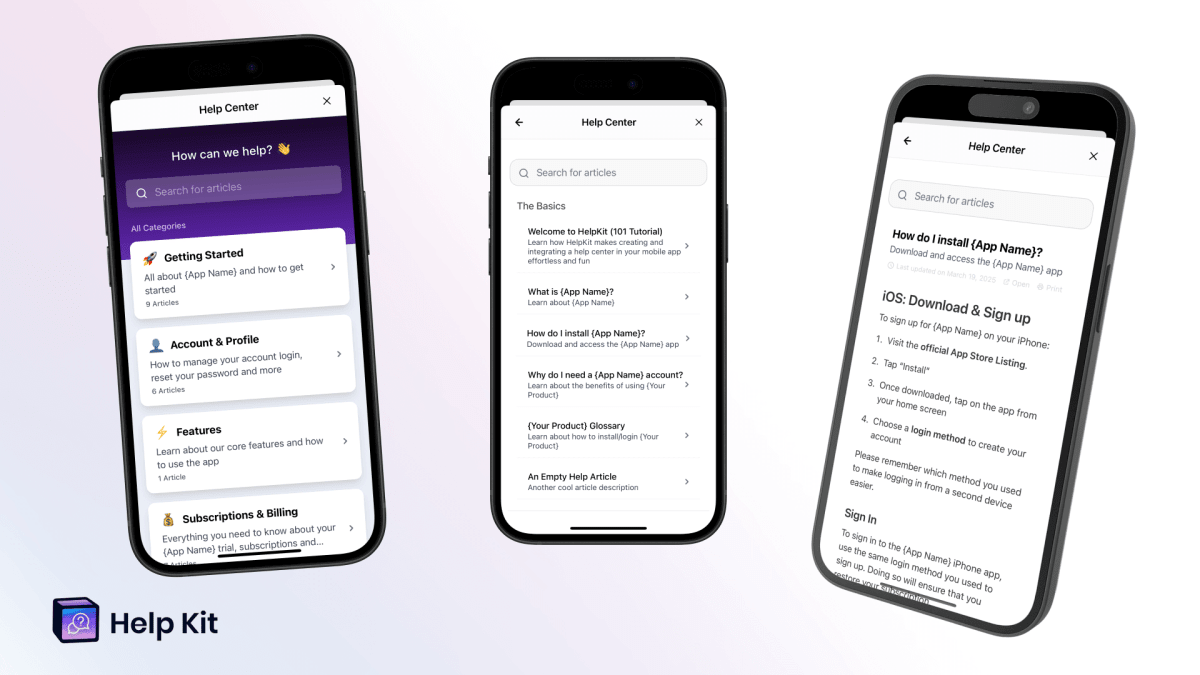
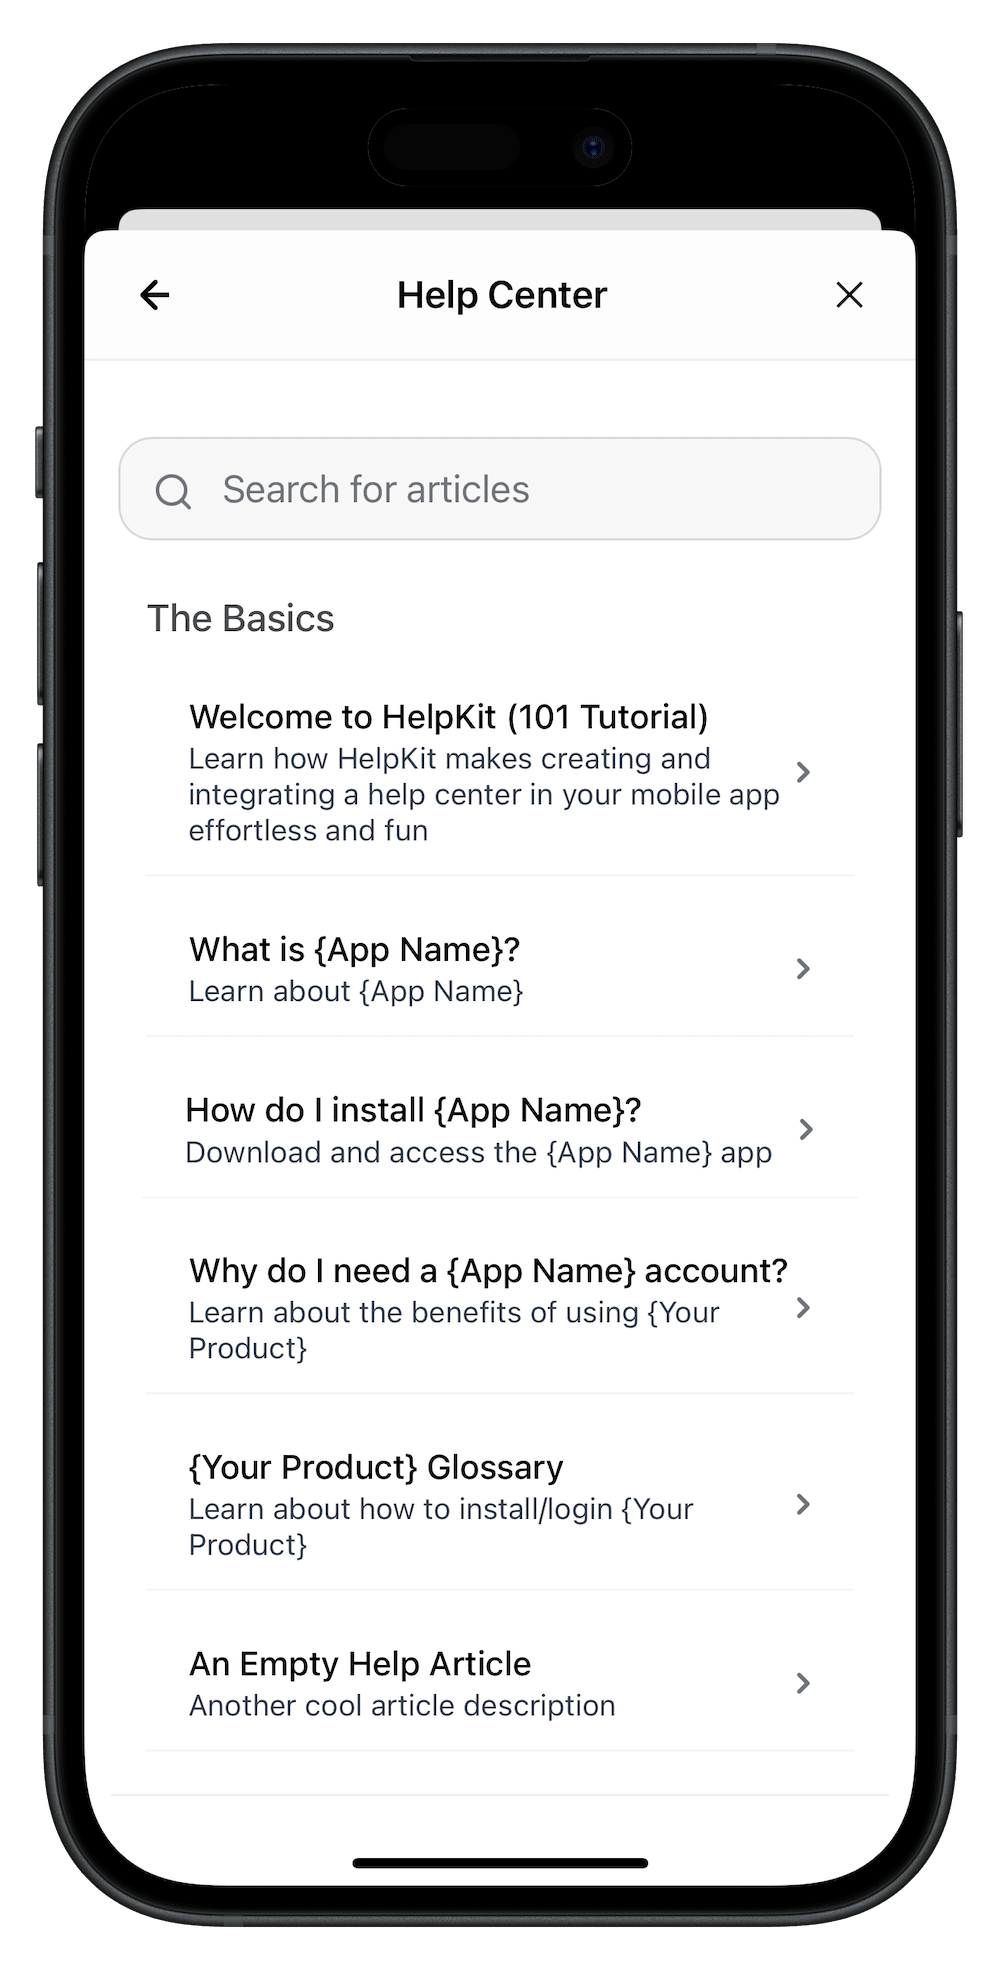
What You'll Build: A Complete Mobile Help Center
By the end of this guide, your React Native iOS & Android consumer app will have:
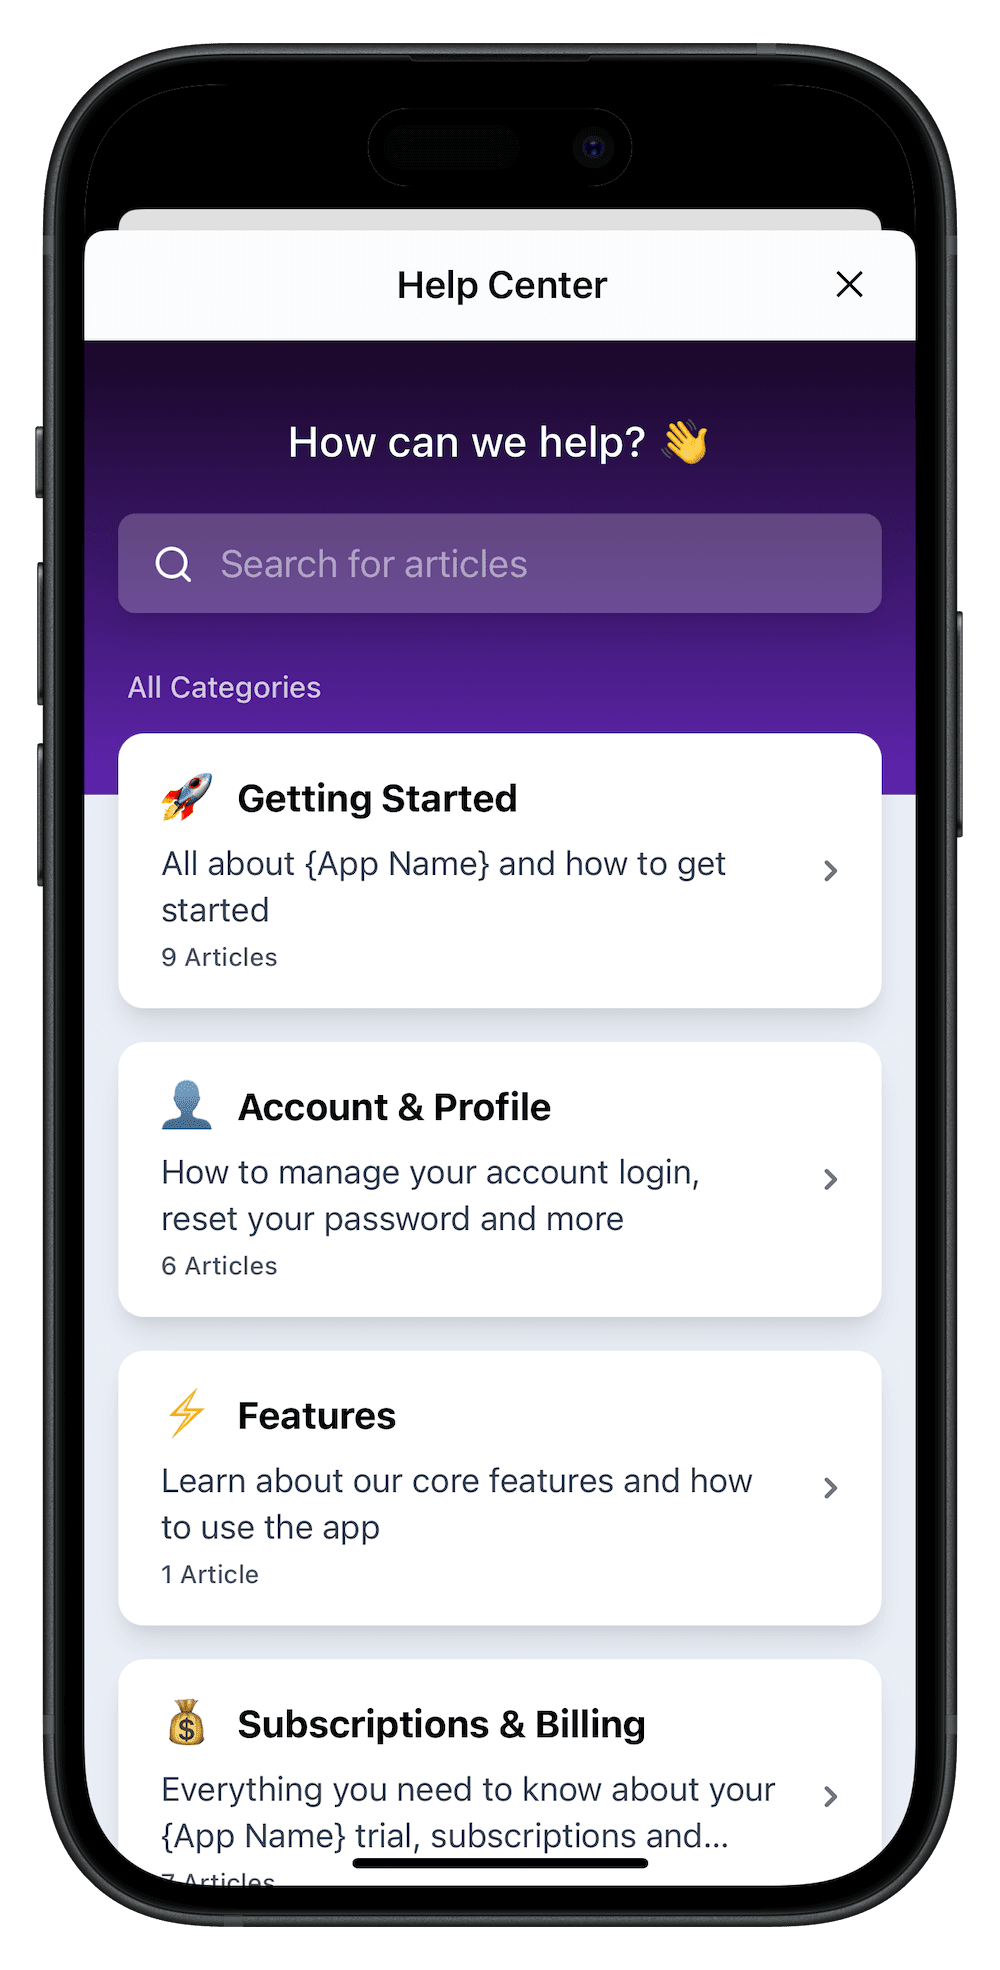
- 🏠 Native help center interface that matches your app's design
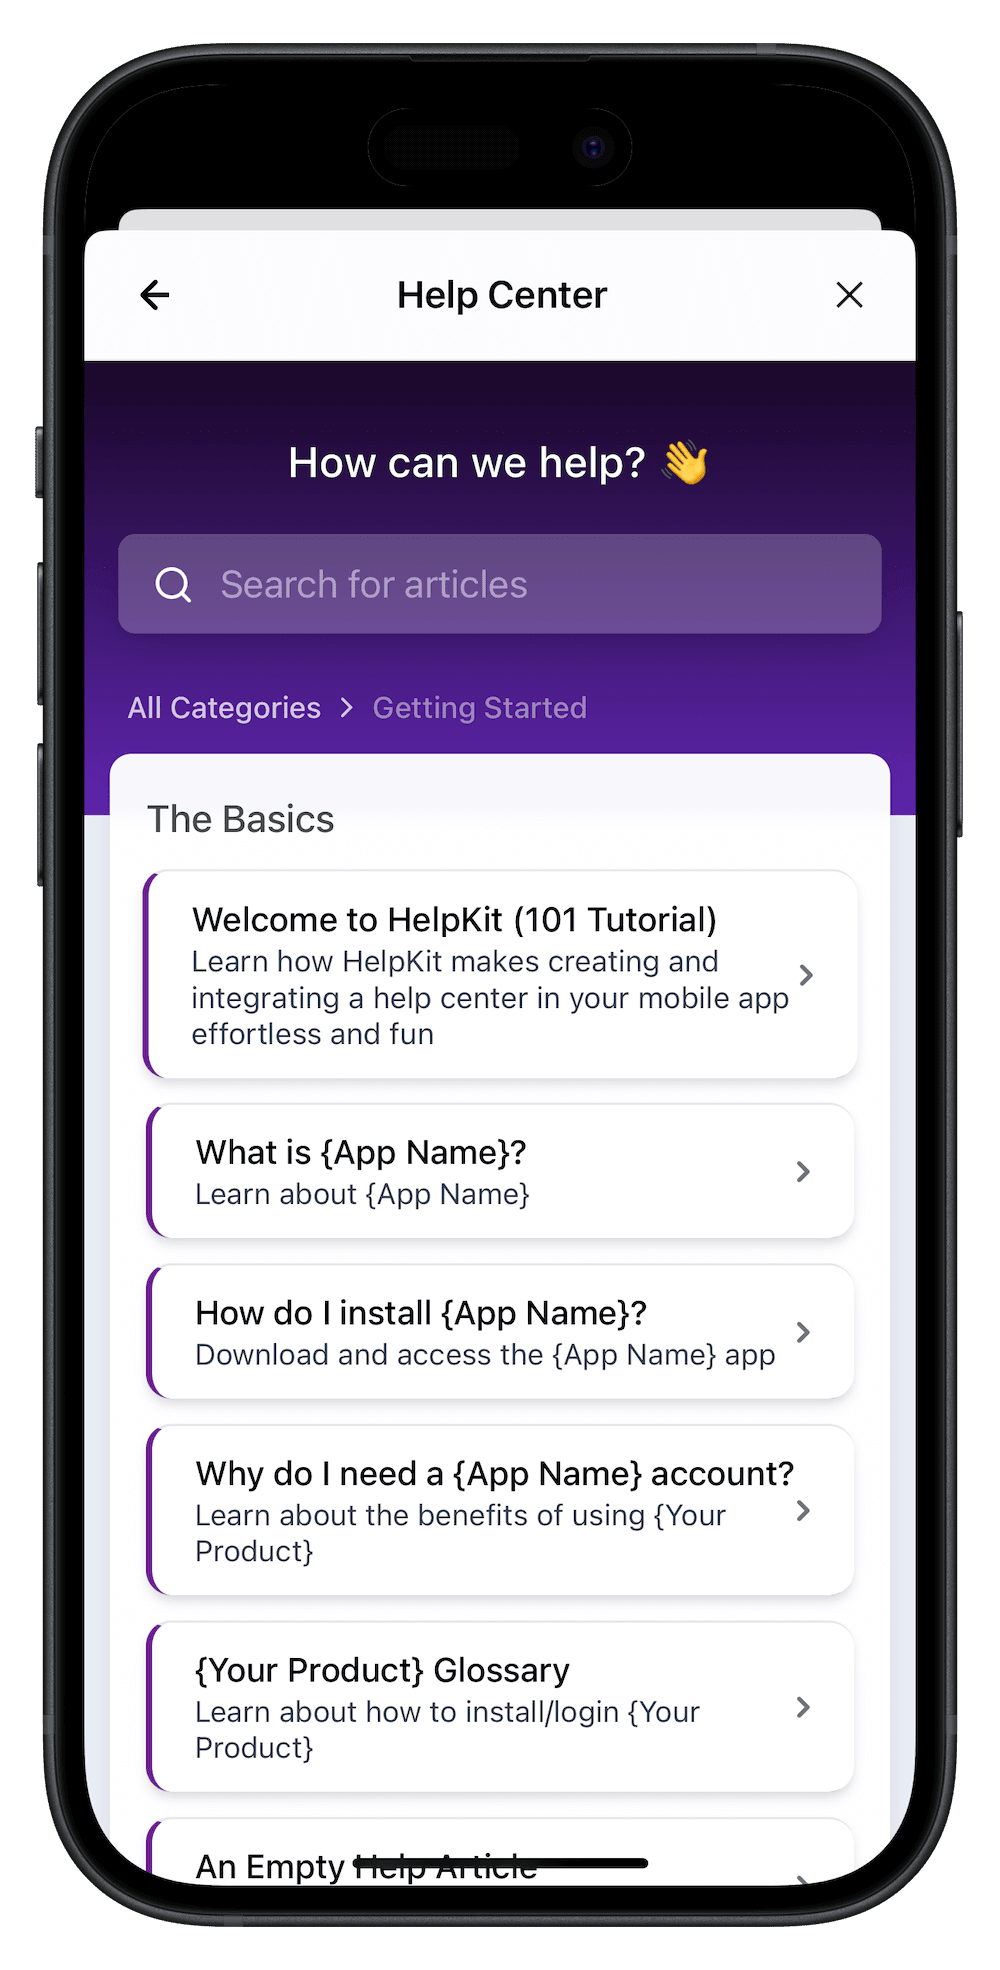
- 🔍 Powerful search functionality to help users find answers instantly
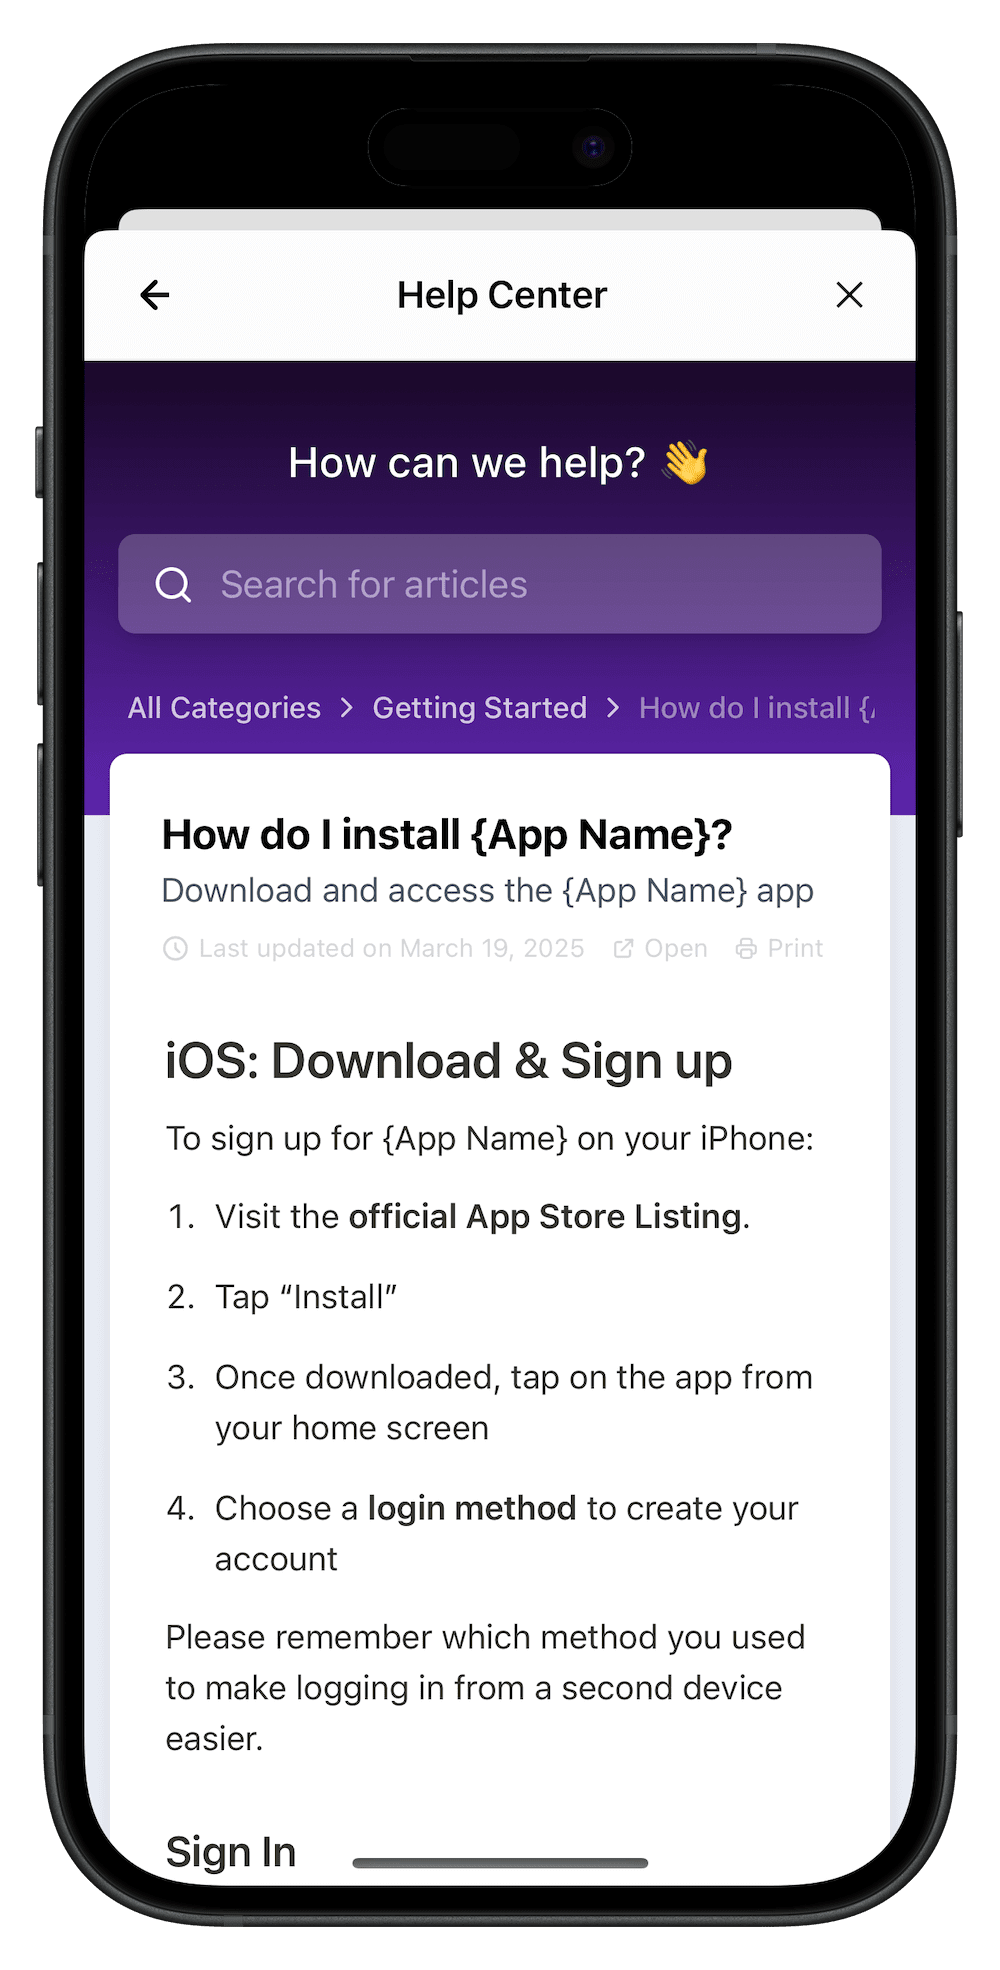
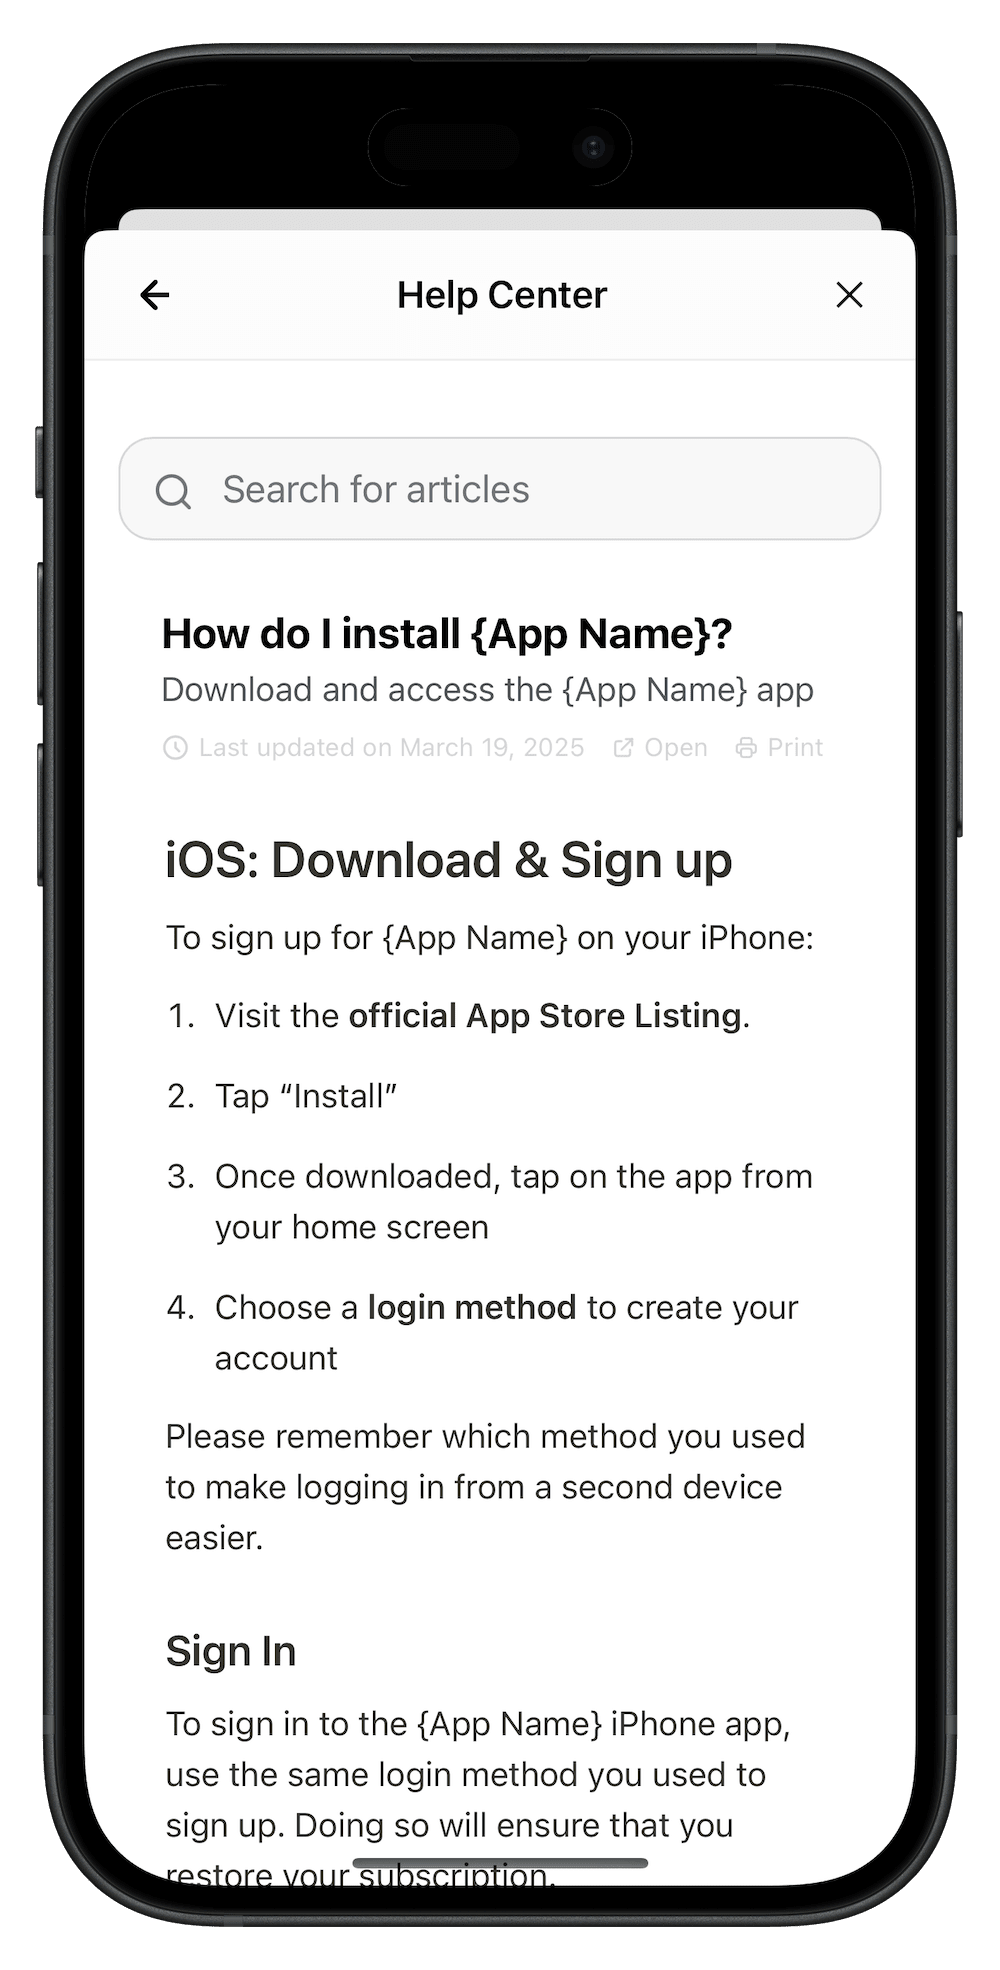
- 📱 Mobile-optimized article viewing with smooth navigation
- 📧 Built-in contact form for when self-service isn't enough
- 📊 Analytics dashboard to track user behavior and content performance
- ⚡ Instant content updates without releasing new app versions
Step-by-Step Implementation Guide
Prerequisites
- React Native development environment
- Notion account (free tier works fine)
- 10-30 minutes of development time
Step 1: Set Up Your HelpKit Account and Content
Create Your HelpKit Project
- Visit helpkit.so and click "Get Started for Free"
- Sign up for the 7-day free trial (no credit card required)
- During onboarding:
- Choose "Help Center" layout style (optimized for consumer apps)
- Upload your app logo and brand colors
- Select the "App Template" for pre-written mobile app support articles
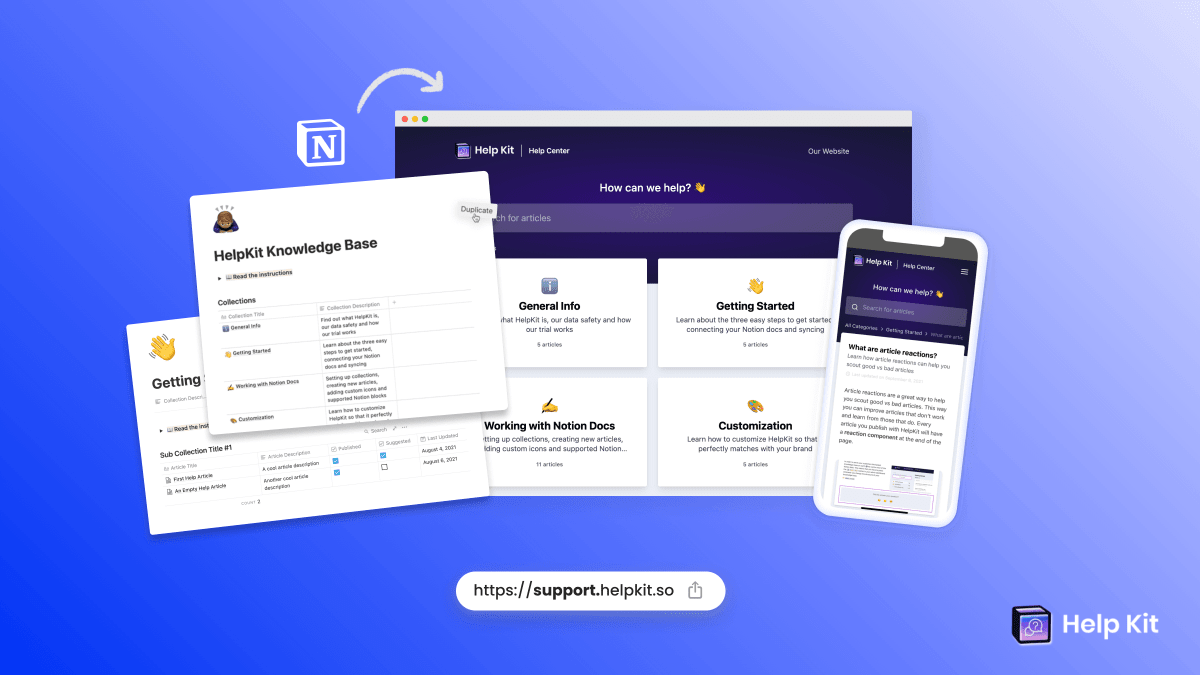
Configure Your Knowledge Base with Our Ready-Made Template
The mobile app template includes essential articles that cover the most common questions consumer apps receive.

Click me to see the template content
👤 Account & Authentication:
- How to create an account (with separate guides for Apple and Android users)
- Password reset instructions
- Profile management
- Account deletion process
🚀 App Installation & Setup:
- How to install the app (iOS and Android specific guides)
- First-time setup walkthrough
- Troubleshooting installation issues
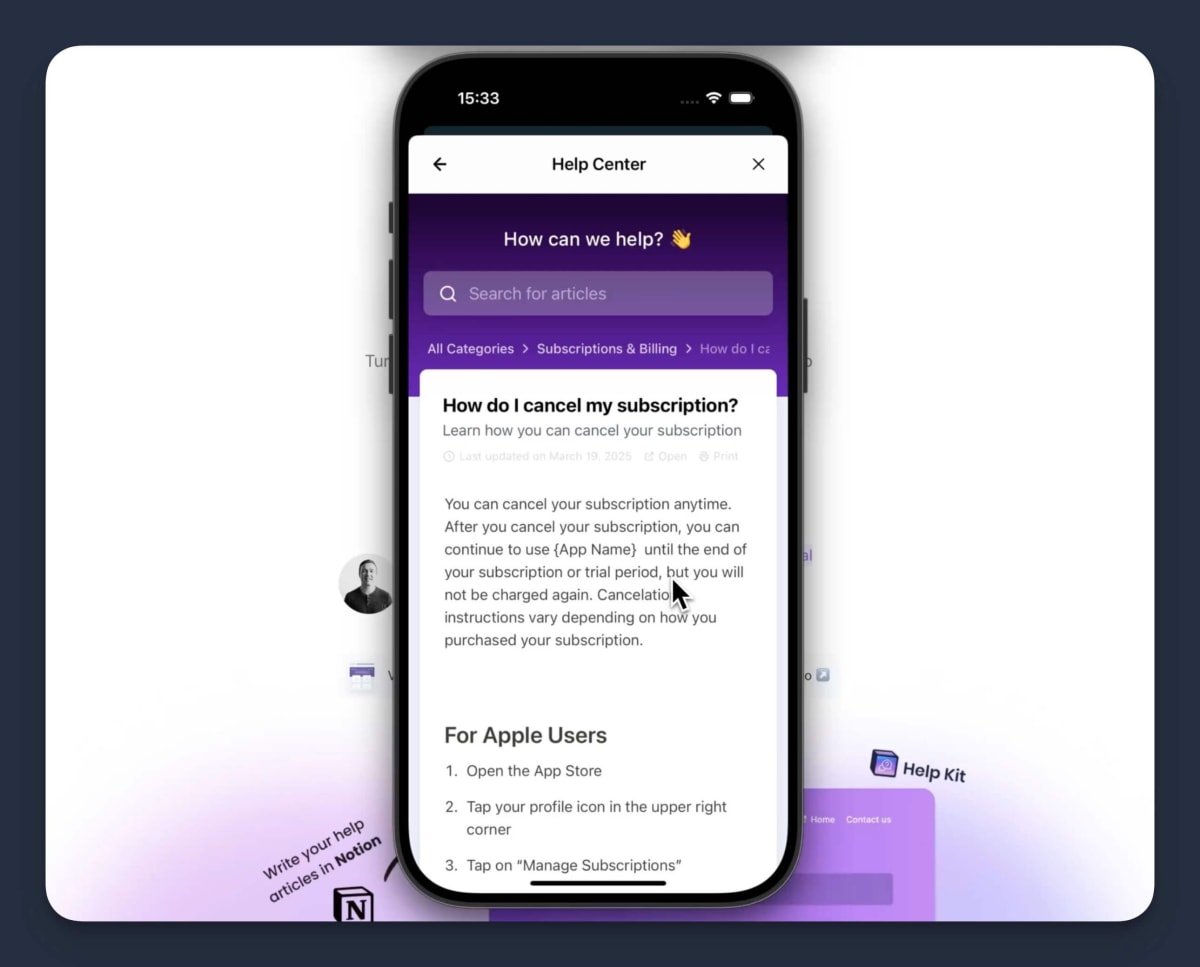
💰 Subscription & Billing:
- Subscription plan comparison
- How to upgrade/downgrade
- Cancellation instructions
- Billing troubleshooting
- Refund policy
⚡ Core Features & Usage:
- Getting started guide
- Feature explanations
- Tips and best practices
🛠️ Technical Support:
- Common troubleshooting steps
- Performance optimization
- Bug reporting process
To connect your Notion content:
- Click "Duplicate" to copy the template to your Notion workspace
- Customize the articles with your app-specific information, features, and branding
- In Notion, click "Share" → "Share to web" and copy the public link
- Paste the link into HelpKit to establish the connection
The beauty of using Notion is that you can easily edit these articles just like any other Notion page – add callout sections to highlight important information, embed videos, use all the rich formatting options you're already familiar with, and have changes sync instantly to your mobile app.
Step 2: Install the React Native SDK
Add HelpKit to your consumer app with a single command:
npm install @helpkit/helpkit-help-center-react-nativeStep 3: Integrate the Help Center Component
Add the Root Component
In your app's root component (typically App.tsx, _layout.tsx, or similar), import and add the HelpKit component:
import { HelpKit } from '@helpkit/helpkit-help-center-react-native'

export default function App() {
  return (
    <YourAppContent>
      {/* Your existing app components */}

      {/* Add HelpKit at the bottom of your root component */}
      <HelpKit
        projectId="YOUR_PROJECT_ID"
        debug={false} // Set to true during development
      />
    </YourAppContent>
  )
}
💡 Find Your Project ID: Available in your HelpKit dashboard under Settings > General. Your Project ID is your project name. In the example of demos.helpkit.so the Project ID would be demos
Create Help Center Entry Points
Add help center access points throughout your consumer app. Common locations include the Settings screen or context aware on specific feature pages.
Example Settings Screen Integration
import { HelpKitSDK } from '@helpkit/helpkit-help-center-react-native'

const SettingsScreen = () => {
  const openHelpCenter = () => {
    HelpKitSDK.open()
  }

  const openBillingHelp = () => {
    HelpKitSDK.openCategory('YOUR_BILLING_CATEGORY_ID')
  }

  return (
    <ScrollView>
      <SettingItem
        title="Help Center"
        icon="help-circle"
        onPress={openHelpCenter}
      />

      <SettingItem
        title="Billing Help"
        icon="credit-card"
        onPress={openBillingHelp}
      />

      <SettingItem
        title="Contact Support"
        icon="mail"
        onPress={() => HelpKitSDK.openContact()}
      />
    </ScrollView>
  )
}
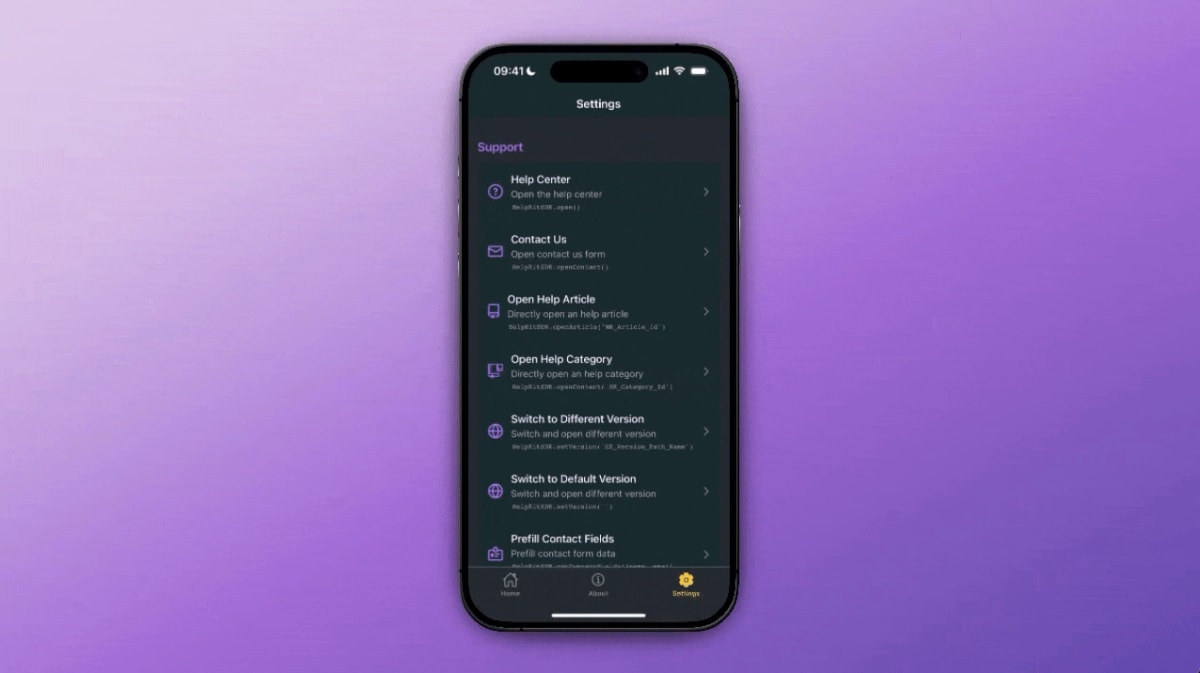
In most cases simply having a button that opens your help center modal should do the trick but if you need more granularity our SDK has got you covered.
Example Context-Aware Help
Show relevant help content based on where users are in your consumer app:
const SubscriptionScreen = () => {
  const showSubscriptionHelp = () => {
    // Open help specific to subscription management
    HelpKitSDK.openArticle('YOUR_SUBSCRIPTION_HELP_ARTICLE_ID')
  }

  return (
    <View>
      <Text>Subscription Settings</Text>
      <Button title="Need Help?" onPress={showSubscriptionHelp} />
    </View>
  )
}
Step 4: Enhance the Contact Experience
Instead of the typical "mailto:" integration that opens the user's email app (which feels clunky and non-native), HelpKit provides a beautiful, embedded contact form. You can even pre-fill it with helpful debugging information:
import { Platform } from 'react-native'
import DeviceInfo from 'react-native-device-info' // Optional: for device details

const setupContactInfo = async () => {
  const deviceInfo = {
    platform: Platform.OS,
    appVersion: await DeviceInfo.getVersion(),
    buildNumber: await DeviceInfo.getBuildNumber(),
    deviceModel: await DeviceInfo.getModel(),
    systemVersion: await DeviceInfo.getSystemVersion()
  }

  HelpKitSDK.setContactFields({
    name: userProfile.name,
    email: userProfile.email,
    metadata: JSON.stringify({
      userId: userProfile.id,
      subscriptionPlan: userProfile.plan,
      lastActiveFeature: analytics.lastFeature,
      deviceInfo: deviceInfo
    })
  })
}

// Call this when user logs in or app starts
useEffect(() => {
  setupContactInfo()
}, [])
Step 5: Customize Your Help Center Appearance
Navigate to Settings > App in your HelpKit dashboard to customize the mobile experience:
App View Configuration
- ✅ Show All Categories: Display all help topics on the main screen
- ✅ Show Suggested Articles: Feature your most important articles prominently
- ✅ Show Contact Us Button: Provide an easy escalation path to human support
🎛️ Note: These settings currently apply to both the mobile SDK and embeddable widget at the same time.
Theme Selection
Choose a theme that complements your consumer app's design:
- HelpKit Theme: Professional design with colored headers and rounded corners
- Minimal Theme: Clean, subtle design that blends seamlessly with any app style

Branding Options
- Upload your app logo for consistent branding
- Set custom colors to match your app's color scheme
Step 6: Test Your Implementation
Development Testing:
# For Expo projects
npx expo start

# For standard React Native
npx react-native run-ios
# or
npx react-native run-android
Test Checklist:
- ✅ Help center opens smoothly from your entry points
- ✅ Search functionality works across your articles
- ✅ Article navigation feels natural and responsive
- ✅ Contact form captures user information correctly
- ✅ Theming matches your app's visual style
Advanced Implementation Strategies
Proactive Help Triggers
Reduce support tickets by showing help proactively:
const CheckoutScreen = () => {
  const [showHelpPrompt, setShowHelpPrompt] = useState(false)

  useEffect(() => {
    // Show help prompt if user stays on checkout for more than 30 seconds
    const timer = setTimeout(() => {
      setShowHelpPrompt(true)
    }, 30000)

    return () => clearTimeout(timer)
  }, [])

  const showPaymentHelp = () => {
    HelpKitSDK.openArticle('YOUR_PAYMENT_TROUBLESHOOTING_ARTICLE_ID')
    setShowHelpPrompt(false)
  }

  return (
    <View>
      {/* Checkout content */}

      {showHelpPrompt && (
        <Modal>
          <Text>Need help with checkout?</Text>
          <Button title="View Payment Help" onPress={showPaymentHelp} />
        </Modal>
      )}
    </View>
  )
}
Direct Article Access
You can open specific articles directly from anywhere in your app:
// Open article directly by ID
HelpKitSDK.openArticle('YOUR_ARTICLE_ID')

// Open a specific category
HelpKitSDK.openCategory('YOUR_CATEGORY_ID')

// Open contact form directly
HelpKitSDK.openContact()
This is particularly powerful for contextual help – for example, adding a ℹ️ info icon next to complex features that opens the relevant help article.
That’s basically all it takes to create a professional help center for your mobile app 🥳 Continue reading to learn how you can improve your app’s help center while you grow.
Leveraging Analytics to Improve Your App’s Help Center
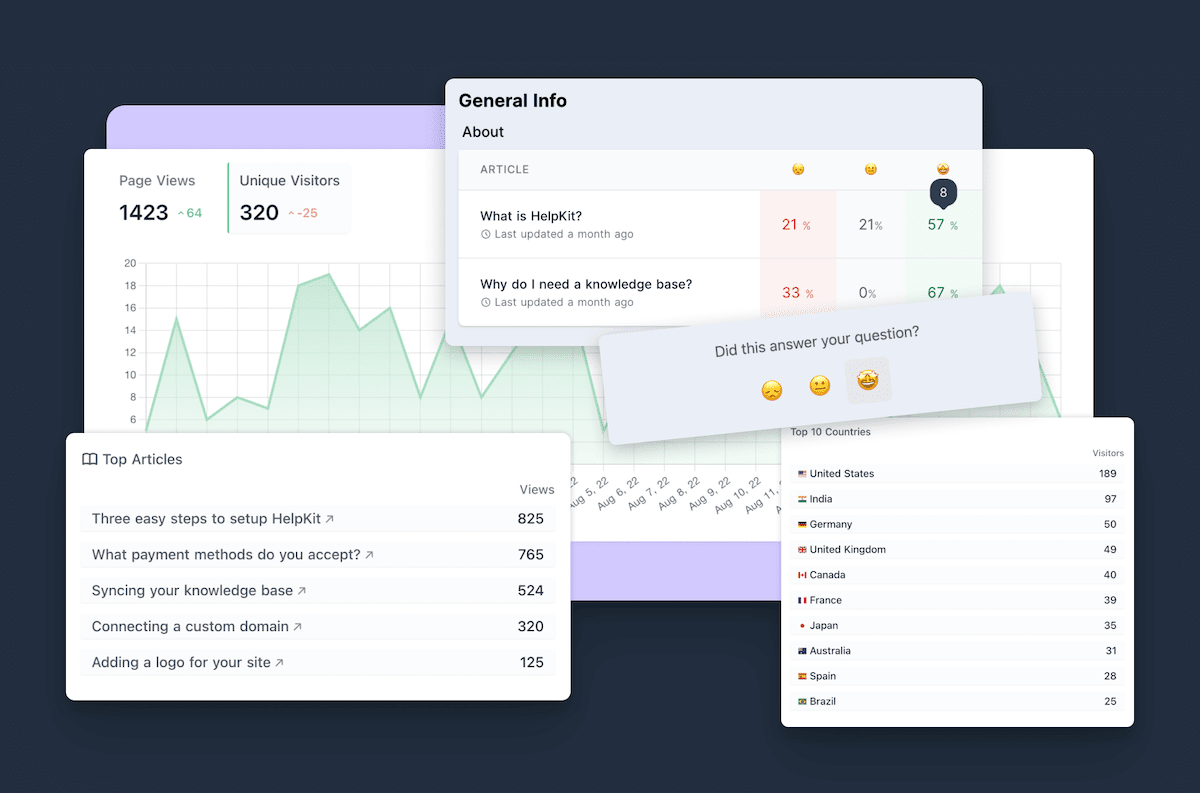
HelpKit isn't just a help center software. It's your complete support optimization platform. Beyond providing beautiful, native help experiences, HelpKit continuously analyzes how your users interact with your content, giving you actionable insights to reduce support tickets and improve user satisfaction over time. Here's how you can turn data into better support experiences:
📊 Key Metrics to Track
In your HelpKit dashboard, monitor:
- 🔍 Most searched terms – Identify what users need most and prioritize content creation
- ❌ Articles with no search results – Spot content gaps before they become support tickets
- 📈 Highest traffic articles – Double-down on popular content and create related topics
- 📧 Contact form submissions – See where self-service fails and users need human help
- ⭐ User feedback scores – Find articles that need improvement or clarity
- 📱 Mobile vs web usage patterns – Understand how your app users behave differently
🎯 Using Insights to Reduce Support Tickets
Content Gap Analysis:
- 📅 Review "no results" search queries weekly to identify missing content
- ✍️ Create new articles for the most common unanswered questions
- 🔄 Update existing articles with missing information users are clearly seeking
- 🔗 Add internal links between related topics to keep users in self-service mode
Performance Optimization:
- 📝 Improve low-scoring articles based on user feedback and comments
- ✂️ Break down complex articles into smaller, digestible pieces
- 🎨 Add visual aids (screenshots, videos, GIFs) to confusing processes
- 🧪 A/B test different article titles for better discoverability and click-through
📚 Managing Your Knowledge Base
The HelpKit Workflow:
- ✏️ Edit articles in Notion using familiar formatting tools and collaboration features
- 🔄 Sync changes in HelpKit with one click to push updates live
- ⚡ Updates appear instantly in your consumer app without any development work
- 🚀 No app store approval required for content changes – update anytime
Best Practices for Continuous Improvement:
- 📊 Review and update articles monthly based on analytics insights
- 👥 Use Notion's collaboration features for team input and content reviews
- 🔔 Set up notifications for user feedback so you can respond quickly
- 📅 Create a content calendar for regular improvements and seasonal updates
- 🎯 Tag articles with categories to track which topics generate the most questions
- 📧 Follow up on contact form submissions to understand what content could have prevented them
➡️ Next Steps: Optimizing Your Consumer App's Support Experience
Transform your app's support strategy with this proven roadmap that takes you from basic implementation to advanced support automation. Here’s the steps you can immediately take:
⚡ Immediate Actions (This Week)
Get your help center live and start reducing support tickets immediately:
- Set up HelpKit account and connect Notion – Use our mobile app template to start with proven content
- Install SDK and add basic integration – Get the help center accessible from your settings screen
- Customize themes and branding – Make it feel like a natural part of your app
- Test help center functionality – Verify search, articles, and contact form work smoothly
- Deploy to production – Start deflecting support tickets immediately
Expected Impact: 📉 20-30% reduction in basic "how-to" support tickets within the first week
📈 Short-term Improvements (Next Month)
Optimize based on real user behavior and maximize ticket deflection:
- 📊 Analyze user search patterns and feedback – Identify your top 5 content gaps
- 📝 Create additional articles based on your actual support ticket trends
- 🎯 Add context-sensitive help triggers – Show relevant help based on user location in your app
- 💡 Implement proactive help prompts – Surface help before users get stuck
- 👨💼 Train your support team on new self-service capabilities and how to reference help articles
- 🔗 Add help center links to your email templates and automated responses
- 📱 Create onboarding tooltips that link to relevant help articles
Expected Impact: 📉 50-60% reduction in repetitive support tickets
🎯 Long-term Strategy (Ongoing)
Build a world-class support experience that scales with your growth:
- 📊 Monitor analytics weekly and continuously improve content based on user behavior
- 🎥 Expand help center with video tutorials and interactive step-by-step guides
- 🤖 Consider HelpKit AI for instant question answering and 24/7 support coverage
- ⭐ Measure impact on app store ratings and user retention metrics
- 🌍 Add multi-language support as you expand to international markets
- 📧 Integrate with your CRM/support tools for seamless escalation workflows
- 🔄 Create feedback loops between support tickets and help content creation
- 📈 Track ROI metrics – support time saved, ticket volume reduction, user satisfaction scores
Expected Impact: 📉 70-80% reduction in support volume, improved app store ratings, higher user retention
Conclusion
Building a successful consumer app means thinking beyond just features and functionality. User support and education are critical components of user experience and retention.
With HelpKit's Mobile SDK, you can:
- Reduce support ticket volume by 60-80%
- Improve user satisfaction and app store ratings
- Free up development time for building features that matter
- Scale your support without scaling your team
- Gain insights into user behavior and content needs
The best part? You can implement this entire system in under 15 minutes using tools you already know and love, starting with our pre-built template that covers all the basics.
Ready to transform how your users get help? Start your free HelpKit trial today →
Additional Resources:
Questions about implementation? Contact our team – we're here to help you succeed.